
Welcome! This manual provides essential guidance for assembling, operating, and maintaining your new recliner chair. Understanding these instructions ensures optimal performance and longevity.
From power lift models to manual options, proper setup is key. Refer to this guide for disassembly, troubleshooting, and warranty details too!
Understanding the Manual’s Importance
This instruction manual is your comprehensive resource for maximizing the enjoyment and lifespan of your new recliner chair; Ignoring these guidelines could lead to improper assembly, operational issues, or even void your warranty.
Detailed instructions cover everything from identifying chair components and the hardware checklist, to safely disassembling the unit when needed. Whether you have a power recliner or a manual model, understanding the specific features is crucial.
Furthermore, the manual highlights essential safety precautions and provides valuable troubleshooting tips for common problems like a recliner not reclining or motor issues. Regular maintenance, including cleaning instructions and lubrication, are also outlined to keep your chair in prime condition.
Safety Precautions
Prioritize safety during assembly and operation of your recliner chair. Always disconnect the power supply before performing any maintenance or disassembly, especially with power recliners.
Keep children and pets away from the chair during operation to avoid accidental activation of the reclining mechanism. Do not overload the chair with excessive weight, as this could compromise its structural integrity.
Inspect all bolts and screws regularly to ensure they remain tight; loose bolts & screws can create instability. Avoid forcing the reclining feature – if resistance is felt, consult the troubleshooting section.
Never attempt to repair the motor or electrical components yourself; contact a qualified technician. Adhering to these precautions ensures a safe and enjoyable experience with your new chair.

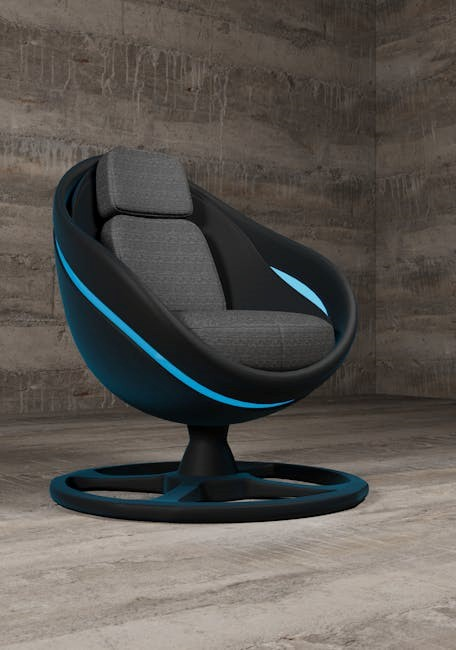
Parts List & Identification
Familiarize yourself with all components! This section details each chair part – from the backrest and armrests to base elements – for smooth assembly.
Identifying Chair Components
Before you begin, carefully unpack all parts and compare them to the provided parts list. Key components include the chair base, providing foundational support, and the backrest, crucial for comfort.
Armrests offer support and contribute to the chair’s overall structure. The seat cushion provides padding, while the reclining mechanism enables adjustable positions.
For power recliners, identify the motor assembly and control panel. Manual recliners will have a release handle. Ensure you locate all hardware – bolts, screws, and washers – as detailed in the hardware checklist.
Refer to diagrams for visual clarification. Correct identification prevents errors during assembly and ensures a secure, functional recliner chair.
Hardware Checklist
Verify all components are present before starting assembly. This checklist details the necessary hardware for a secure and functional recliner chair; You should find: Bolts (various sizes – check quantities!), Screws (Phillips head and flathead), and Washers (to distribute pressure).
Nuts are essential for securing bolts, while Wood screws may be used for attaching certain panels. Allen wrenches (specific sizes) are often included for tightening specific bolts.
Power recliner models may include additional wiring connectors. Carefully count each item against the parts list. Missing hardware can halt assembly; contact customer support if anything is absent.
Organize the hardware for easy access during the assembly process. Proper preparation streamlines the build and prevents frustration.

Assembly Instructions
Follow these steps carefully for successful assembly! Begin by attaching the backrest, then connect the armrests. Finally, install the seat cushion and base.
Attaching the Backrest
Carefully align the backrest with the chair’s base, ensuring the metal brackets slide smoothly into the receiving slots. You may need a second person to assist with this step, as the backrest can be somewhat heavy.
Secure the backrest using the provided bolts and washers – typically found in the hardware checklist. Tighten these bolts gradually and evenly, avoiding over-tightening which could damage the frame.
Double-check that the backrest is firmly attached and doesn’t wobble. A secure connection is crucial for safety and comfort. Refer to the diagrams in this manual for correct bolt placement. Ensure all connections are stable before proceeding to the next assembly stage.
Connecting the Armrests
Position the armrests on either side of the chair, aligning the pre-drilled holes with those on the chair frame. Ensure the armrests are oriented correctly – often indicated by a left and right designation.
Insert the appropriate bolts (refer to the hardware checklist) through the holes and hand-tighten them. Again, gradual and even tightening is key to prevent frame damage.
Utilize a wrench or Allen key to fully secure the bolts, but avoid excessive force. Confirm the armrests are firmly attached and don’t exhibit any play. A stable connection is vital for overall chair stability and user safety. Review diagrams for correct placement.
Installing the Seat Cushion
Carefully place the seat cushion onto the chair frame, ensuring it aligns with the designated area. Some cushions may have specific orientations – check for labels or unique shaping.
Locate any attachment points, such as Velcro straps or clips, and secure the cushion accordingly. These features prevent shifting during use and maintain proper support.
Confirm the cushion sits flush with the chair frame and doesn’t obstruct the reclining mechanism. A secure fit is crucial for comfort and functionality. Inspect for any gaps or unevenness. Proper installation enhances the overall seating experience and extends the cushion’s lifespan.
Assembling the Base
Begin by identifying all base components – typically including side rails, front and rear supports, and connecting hardware. Refer to the parts list to ensure you have everything needed.
Attach the side rails to the front and rear supports using the provided bolts and washers. Ensure proper alignment before tightening. Hand-tighten initially, then use a wrench to fully secure.
Double-check all connections for stability. A wobbly base can compromise the chair’s safety and functionality. Confirm the base is level before proceeding. Securely fastened components are vital for long-term durability and a comfortable reclining experience.
Power Recliner Specifics
Power recliners require careful connection and testing. Understand the control panel functions for safe and efficient operation, maximizing your comfort and enjoyment!
Connecting the Power Supply
Before connecting, ensure the recliner is switched OFF. Locate the power cord extending from the chair’s motor housing, typically underneath the seat. Plug this cord directly into a grounded, standard electrical outlet – avoid extension cords if possible.
Verify the outlet voltage matches the recliner’s requirements (usually 120V). Inspect the power cord for any damage before insertion. If damage is present, do not connect and contact customer support. A secure connection is vital for safe operation and prevents potential electrical hazards.
Caution: Never operate a power recliner with a damaged cord. Always disconnect the power before performing any maintenance or troubleshooting. Improper connection can void the warranty.
Testing the Reclining Mechanism
After connecting the power supply, carefully test the reclining function. Locate the control panel – usually on the chair’s armrest – and gently press the recline button. The backrest should smoothly move into the reclined position.
Verify the footrest extends simultaneously. Test both the recline and return functions multiple times, ensuring consistent and fluid operation. Listen for any unusual noises during movement, which could indicate a problem.
Important: Keep clear of moving parts during testing. If the mechanism doesn’t respond, double-check the power connection and consult the troubleshooting section. Do not force the mechanism.
Understanding the Control Panel
Your power recliner’s control panel is the central hub for operation. Typically located on the armrest, it features buttons for recline, lift (if applicable), and potentially headrest/lumbar adjustments. Familiarize yourself with each button’s function before use.
Some panels include a USB charging port for convenient device charging. Others may have preset memory positions for customized comfort. The panel might also incorporate a safety feature, halting movement upon obstruction.
Refer to the diagram included in this manual for specific button layouts. If you encounter issues, consult the troubleshooting guide or contact customer support. Never attempt to disassemble or repair the control panel yourself.

Manual Recliner Operation
Activate the recline feature by gently leaning back while applying pressure to the release handle, located on the chair’s side. Adjust positions as desired!
Activating the Reclining Feature
To initiate the reclining motion on your manual recliner, locate the activation handle – typically situated on the chair’s right-hand side. Gently, yet firmly, pull the handle outwards. Simultaneously, lean your body weight backwards. This combined action releases the locking mechanism, allowing the chair to recline.
Important Note: Avoid abrupt or forceful movements. A smooth, controlled lean is crucial for safe and comfortable operation. Ensure there are no obstructions behind the chair before reclining. The further you lean back, the greater the recline angle will become. Release the handle to lock the chair in your preferred position. Practice a few times to become familiar with the required pressure and motion.
Safety First: Always ensure pets and children are clear of the reclining path to prevent accidental injury.
Adjusting Recline Positions
Fine-tuning your comfort is simple! Once reclined, you can adjust the position by maintaining gentle pressure with your back while simultaneously manipulating the recline handle. Lifting slightly on the handle while shifting your weight allows for incremental adjustments.
To return to an upright position, apply gentle forward pressure with your body while lifting on the recline handle. The chair will gradually return to its original position. Remember, a smooth and controlled motion is key. Avoid sudden movements to prevent strain on the mechanism.
Experiment with different angles to find your ideal relaxation spot. Regularly check that the locking mechanism securely holds the chair in place at each chosen position.

Disassembly Instructions
Carefully reverse the assembly process. Begin by detaching armrests, then the backrest, and finally disassemble the base for efficient transport or storage.
Removing the Backrest
Before beginning, ensure the recliner is in its upright position and disconnected from any power source if applicable. Locate the mounting brackets connecting the backrest to the chair’s frame – these are typically found on either side.
Using the appropriate tools (often a socket wrench or Allen key – check your hardware checklist!), carefully loosen and remove the bolts or screws securing the backrest. It’s helpful to have a second person assist during this step to prevent strain or damage.
Once all fasteners are removed, gently lift the backrest upwards and away from the chair base. Avoid forcing it, as this could damage the upholstery or frame. Store the backrest in a safe, protected area to prevent scratches or other damage during storage or transport.
Detaching the Armrests
Prior to removing the armrests, ensure the recliner is stable and positioned on a protected surface to prevent scratches. Typically, armrests are attached with bolts, screws, or a combination of both, located underneath and at the rear of the armrest itself.
Carefully inspect these connection points and use the correct tools – often a socket wrench or Allen key – to loosen and remove the fasteners. A second person can be beneficial for support during this process.
Once all fixings are detached, gently pull the armrest upwards and outwards. Avoid excessive force. Repeat this process for the other armrest. Store the armrests safely, protecting them from damage during storage or transport.
Disassembling the Base
Disassembling the recliner base requires careful attention to the connecting hardware. Begin by identifying all bolts, screws, and plates securing the base components – often the seat frame and supporting legs or mechanisms.
Use appropriate tools to loosen and remove these fasteners, keeping track of their location for reassembly. The base may consist of multiple sections joined together; detach these sections one by one, supporting each piece as it’s removed to prevent damage.
Pay close attention to any wiring or cables connected to the base, especially in power models, and disconnect them safely. Store all base components and hardware in a secure location.
Troubleshooting Common Issues
Facing problems? This section addresses typical recliner malfunctions, like non-reclining issues, motor failures, or loose parts. Find quick fixes here!
Recliner Not Reclining
Is your recliner refusing to recline? First, ensure the power cord is securely connected if it’s a power model. Check the control panel for any indicator lights or error signals. For manual recliners, verify nothing is obstructing the reclining mechanism underneath the chair.
Inspect the linkage for any disconnections or damage. Sometimes, a simple readjustment of the cable can resolve the issue. If the problem persists, carefully examine the release handle or lever for proper function. A stuck or broken handle will prevent reclining.
Loose bolts or screws within the frame can also hinder movement. Tighten any loose hardware. If you’re uncomfortable performing these checks, consult a qualified technician to avoid further damage or injury.
Motor Issues (Power Recliners)
Experiencing motor problems with your power recliner? First, confirm the power outlet is functioning correctly by testing it with another device. If the outlet is fine, inspect the motor housing for any visible damage or loose connections. A blown fuse or tripped circuit breaker could also be the culprit – check your electrical panel.
Listen for any unusual noises coming from the motor during operation. Grinding or clicking sounds often indicate internal motor failure. Replacement lift motors are available, like the Mcombo options, but professional installation is recommended.
Caution: Do not attempt to disassemble the motor yourself, as this could void the warranty and pose a safety risk. Contact customer support or a qualified repair technician for assistance.
Loose Bolts & Screws
Regularly inspect your recliner for loose bolts and screws. This is a crucial maintenance step to ensure stability and prevent potential hazards. Pay particular attention to the connections between the backrest, armrests, and base – these areas are prone to loosening with use.
Use the appropriate tools to tighten any loose fasteners. Avoid over-tightening, as this could strip the threads or damage the wood frame. If you discover stripped screws, consider replacing them with slightly larger ones for a more secure hold.
Important: During assembly, double-check that all hardware is properly tightened. A thorough initial assembly minimizes the risk of future loosening. Periodic checks, perhaps monthly, are highly recommended;

Maintenance & Care
Preserve your recliner’s beauty! Regular cleaning, lubrication of moving parts, and upholstery protection will extend its life and maintain its comfort and appearance.
Cleaning Instructions
Maintaining a clean recliner is crucial for longevity and hygiene. For most upholstery types, regular vacuuming with a soft brush attachment is recommended to remove dust and debris.
Spot clean spills immediately using a mild detergent and damp cloth, blotting gently – avoid rubbing. Always test cleaning solutions in an inconspicuous area first to ensure colorfastness.
Leather recliners require specialized leather cleaners and conditioners to prevent drying and cracking. Avoid harsh chemicals and abrasive cleaners. For fabric recliners, check the care label for specific cleaning codes (W, S, WS, or X) and follow those guidelines accordingly.
Professional cleaning is recommended annually for a thorough deep clean, especially for delicate fabrics or leather.
Lubrication of Moving Parts
Regular lubrication ensures smooth operation and prevents wear and tear on your recliner’s moving components. Focus on the reclining mechanism, including hinges, pivot points, and the lift motor (if applicable).
Use a silicone-based lubricant specifically designed for furniture; avoid oil-based products which can attract dust and grime. Apply sparingly to the designated areas, working the lubricant into the joints.
For power recliners, carefully lubricate the motor’s gears, following the manufacturer’s instructions. Avoid over-lubrication, as excess lubricant can attract dirt. Inspect the reclining mechanism periodically for any signs of stiffness or binding, and address them promptly with lubrication.
This simple maintenance step extends the life of your recliner and maintains its comfortable functionality.
Protecting the Upholstery
Maintaining your recliner’s upholstery is crucial for preserving its appearance and extending its lifespan. Avoid direct sunlight exposure, as it can cause fading and deterioration. Regularly vacuum the upholstery using a soft brush attachment to remove dust and debris.
For spills, act quickly! Blot the area with a clean, dry cloth – avoid rubbing, which can spread the stain. Use a mild upholstery cleaner specifically designed for your fabric type, testing it in an inconspicuous area first.
Consider using a fabric protector spray to repel liquids and stains. Rotate cushions regularly to ensure even wear. Protect from pets with covers or designated areas.
Proper care keeps your recliner looking its best for years to come.

Warranty Information
Our recliner chairs are covered by a limited warranty against manufacturing defects. Coverage details and the claim process are outlined within this manual for your review.
Coverage Details
This warranty covers defects in materials and workmanship under normal use for a period of one year from the original purchase date. Specifically, it includes the reclining mechanism, frame integrity, and motor functionality (for power recliners).
However, this warranty does not cover damage resulting from misuse, abuse, accidents, improper cleaning, or normal wear and tear. Upholstery fading or damage, and issues arising from unauthorized repairs are also excluded. The warranty is valid only for the original purchaser and is non-transferable. Proof of purchase is required for all warranty claims.
We reserve the right to repair or replace any defective part or product at our discretion. This warranty provides a clear understanding of what is protected, ensuring your satisfaction with your new recliner chair.
Claim Process
To initiate a warranty claim, please contact our customer support team via phone or email, providing your original purchase date, order number, and a detailed description of the issue. Include clear photographs or a short video demonstrating the defect.
Our support team will assess your claim and, if approved, provide instructions for returning the defective part or the entire recliner chair. Return shipping costs may be the responsibility of the customer, depending on the nature of the defect.
Upon receiving the returned item, we will inspect it and either repair or replace it. The claim process is designed to be straightforward and efficient, ensuring a positive experience.

Frequently Asked Questions (FAQ)
Q: How long does assembly take? A: Typically, around 30 minutes, but it depends on the model. Refer to the assembly instructions for a detailed overview of the parts.
Q: What if my recliner isn’t reclining? A: Check for obstructions and ensure the power cord (if applicable) is securely connected. Consult the troubleshooting section for further assistance.
Q: Can I disassemble the chair for moving? A: Yes, but carefully follow the disassembly instructions to avoid damage. Videos are available online to assist with this process.
Q: Where can I find replacement parts? A: Contact our customer support team with the part number for assistance.