
Honeywell T5 Smart Thermostat Manual: A Comprehensive Guide
This comprehensive manual unlocks the full potential of your Honeywell T5. Explore features, installation, operation, and maintenance for seamless smart home integration.
Discover how to maximize your Honeywell T5’s capabilities!
The Honeywell T5 is a smart thermostat designed to bring comfort and energy savings to your home. Released as a more affordable option within the Honeywell Lyric family, the T5 distinguishes itself by offering compatibility with Apple HomeKit, alongside Amazon Alexa voice control. This allows for convenient temperature adjustments using Siri or Alexa voice commands.
Unlike some competitors, the T5 doesn’t boast a strikingly modern aesthetic, instead presenting a more traditional, rectangular design. However, its functionality and ease of use compensate for this. It’s a solid choice for those seeking a smart thermostat without the premium price tag of higher-end models like the Nest Learning Thermostat.
This thermostat regulates heating and cooling systems, optimizing temperature based on your preferences and schedule. It’s a smart home upgrade that can contribute to lower energy bills and a more comfortable living environment. The T5 offers a balance between features, affordability, and compatibility, making it a popular choice for many homeowners.
What’s Included in the Box
Upon opening your Honeywell T5 thermostat package, you’ll find several key components necessary for installation and operation. The core item, of course, is the Honeywell T5 Smart Thermostat itself, featuring a clear display and intuitive controls. Included alongside the thermostat is a backplate, designed for mounting on your wall, ensuring a secure and stable installation.
You’ll also receive a comprehensive set of screws and wall anchors, catering to various wall types and providing a robust mounting solution. Crucially, the box contains wire labels, essential for correctly identifying your existing thermostat wiring during the installation process – a step vital for avoiding errors.
A quick start guide is provided, offering a simplified overview of the setup process. For more detailed instructions, a full user manual is included, covering all features and troubleshooting steps. While some advanced features require the Honeywell Home app, the app itself is a separate download.
Thermostat Compatibility & System Requirements
Before installing your Honeywell T5, verifying compatibility with your existing heating and cooling system is crucial. The T5 generally supports most 24V heating and cooling systems, including forced air, heat pump (without auxiliary heat control), and radiant systems. However, it’s not compatible with high-voltage systems (110V/220V) or millivolt systems.
To ensure seamless operation, a common wire (C-wire) is typically required for continuous power. If you lack a C-wire, a C-wire adapter may be necessary – these are sold separately. The thermostat requires a 2.4 GHz Wi-Fi network connection for smart features and remote control via the Honeywell Home app.
Compatibility with Apple HomeKit is a key feature, but requires an Apple device (iPhone, iPad, or Apple TV) acting as a HomeKit hub. Amazon Alexa integration is also supported, but requires an Alexa-enabled device. Finally, confirm your system doesn’t utilize proprietary communication protocols that may hinder functionality.
Installation Guide: Wiring the T5

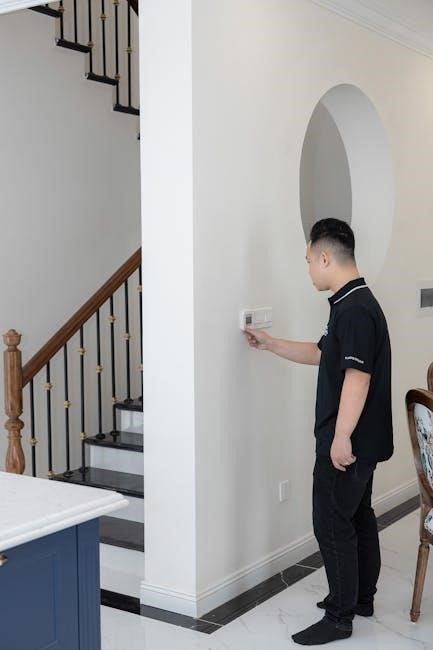
Prior to wiring, always shut off power to your HVAC system at the breaker box! Carefully remove your old thermostat, labeling each wire as you disconnect it. The Honeywell T5 utilizes a standard terminal block. Common terminals include Rh (heating power), Rc (cooling power), W (heating), Y (cooling), G (fan), and C (common).
Match the labeled wires to the corresponding terminals on the T5 backplate. If you have a heat pump system, consult the detailed wiring diagrams in the included manual, as configurations can vary. Securely connect each wire to its terminal, ensuring a firm connection.
If a C-wire wasn’t previously present, and you’re using an adapter, follow the adapter’s specific instructions carefully. Once all wires are connected, mount the T5 backplate to the wall and attach the thermostat display. Restore power at the breaker box before proceeding to the next step.
Connecting to Wi-Fi
To connect your Honeywell T5 to Wi-Fi, begin by downloading and installing the Honeywell Home app on your smartphone or tablet. Ensure your mobile device is connected to your home’s 2.4 GHz Wi-Fi network – the T5 doesn’t support 5 GHz. Power on the thermostat; it will enter pairing mode automatically after initial installation.
Open the Honeywell Home app and follow the on-screen instructions to add a new device. The app will search for your T5 thermostat. Select your thermostat when it appears, and enter your Wi-Fi network password when prompted. The thermostat will then connect to your Wi-Fi network.
Successful connection is indicated by a Wi-Fi symbol on the thermostat display. If the connection fails, ensure your password is correct and your router is within range. You can also try restarting both the thermostat and your router. Once connected, you can control your thermostat remotely via the app!
Setting Up the Honeywell Home App
The Honeywell Home app is central to controlling your T5 thermostat. Begin by downloading it from the App Store (iOS) or Google Play Store (Android). Once installed, create a new account or log in with existing Honeywell Home credentials. Follow the in-app prompts to add your thermostat – the app guides you through the process step-by-step.
During setup, you’ll be asked to provide your location for geofencing features and to name your thermostat for easy identification. You can also customize comfort settings and create schedules within the app. Explore the app’s interface to familiarize yourself with its various features, including remote control, energy usage reports, and alerts.
The app allows for multiple user access, enabling family members to control the thermostat. Regularly check for app updates to ensure you have the latest features and security enhancements. A properly configured app unlocks the full potential of your Honeywell T5!
Understanding the Thermostat Interface
The Honeywell T5’s interface is designed for intuitive operation. The main screen displays the current room temperature, set temperature, and operating mode (Heat, Cool, Auto, Off). Use the up and down arrows to adjust the set temperature. The ‘Mode’ button cycles through the available operating modes. A prominent display indicates Wi-Fi connectivity status.
The menu button, typically represented by three horizontal lines, grants access to advanced settings like scheduling, fan control, and system information. The touchscreen responds to gentle touches; avoid excessive pressure. The display dims automatically to conserve energy and reduce glare.
Pay attention to the icons displayed – a flame indicates heating, a snowflake signifies cooling, and a fan icon controls the fan operation. Familiarizing yourself with these visual cues will streamline your interaction with the thermostat. The interface prioritizes simplicity and ease of use for a comfortable experience.
Programming Schedules: Basic Operation

Creating a schedule with your Honeywell T5 optimizes comfort and energy savings. Access the scheduling function through the menu button on the thermostat interface. You’ll typically define different periods – Wake, Leave, Return, and Sleep – and assign a desired temperature to each. The T5 allows for separate schedules for weekdays and weekends, accommodating varying routines.
To set a schedule, select a period and use the up/down arrows to adjust the temperature. Confirm your selection and repeat for each period. You can copy settings from one day to another for convenience. The thermostat remembers your preferences and automatically adjusts the temperature based on the programmed schedule.
Experiment with different temperature settings to find the optimal balance between comfort and energy efficiency. Regularly review and adjust your schedule as your lifestyle changes. The T5’s scheduling feature empowers you to take control of your home’s climate.
Advanced Scheduling Features

Beyond basic scheduling, the Honeywell T5 offers advanced features for refined climate control. Utilize the “Smart Response” function to allow the thermostat to learn how long it takes to reach your desired temperature, optimizing start times for maximum comfort. Explore the “Filter Change Reminder” to maintain system efficiency and air quality – set a reminder based on usage.
The T5 also supports temporary holds, overriding the programmed schedule for a specified duration. This is ideal for unexpected changes in routine. For extended absences, employ the “Vacation Mode” to maintain a constant, energy-saving temperature. Access these features through the thermostat’s menu, navigating with the intuitive interface.
Leverage the Honeywell Home app for remote access and advanced schedule customization. Create more granular schedules, and monitor energy usage patterns. These advanced features elevate your control and contribute to significant energy savings.
Using Geofencing for Automated Control
Geofencing leverages your smartphone’s location to automatically adjust the thermostat settings. Within the Honeywell Home app, define a virtual “fence” around your home. When your phone enters this zone, the thermostat will switch to your “Home” temperature setting, ensuring comfort upon arrival.
Conversely, as you leave the geofenced area, the thermostat automatically reverts to the “Away” temperature, conserving energy while you’re out. This feature eliminates the need for manual adjustments and provides seamless, automated climate control. Configure multiple users within the app to optimize geofencing for all household members.

Important considerations: Ensure location services are enabled on your smartphone and that the Honeywell Home app has the necessary permissions. Adjust the geofence radius to suit your needs, preventing false triggers. Geofencing offers a convenient and effective way to maximize energy efficiency and comfort.
Voice Control with Siri and Amazon Alexa
The Honeywell T5 seamlessly integrates with both Apple’s Siri and Amazon Alexa, offering hands-free temperature control. To enable voice control, link your Honeywell Home account within the Alexa or Apple Home app. Once connected, you can use voice commands to adjust the temperature, set modes (heat, cool, auto), and check the current status.
With Siri, try commands like “Hey Siri, set the thermostat to 72 degrees” or “Hey Siri, what’s the temperature inside?”. For Alexa, use phrases such as “Alexa, increase the thermostat by 2 degrees” or “Alexa, set the thermostat to heat mode”. Ensure your devices are properly configured and connected to the same Wi-Fi network.
Voice control provides a convenient and accessible way to manage your home’s climate, especially when your hands are full. Explore the full range of supported commands within the Honeywell Home app for optimal functionality.
Troubleshooting Common Issues
If your Honeywell T5 experiences issues, several troubleshooting steps can resolve them. First, check the Wi-Fi connection; a weak signal can cause connectivity problems. Ensure the thermostat is within range of your router and restart both devices. Second, verify the wiring is secure and matches your system’s configuration – incorrect wiring is a frequent cause of malfunctions.
If the thermostat doesn’t respond, try resetting it (see the ‘Resetting Your Honeywell T5’ section). For unresponsive displays, check the battery level if applicable. If scheduling isn’t working, double-check the programmed schedule within the Honeywell Home app.
Common problems include inaccurate temperature readings; recalibrate the thermostat if necessary. If issues persist, consult the Honeywell Home support website or contact customer service for further assistance. Detailed FAQs and troubleshooting guides are available online.
Resetting Your Honeywell T5
Resetting your Honeywell T5 can resolve many operational issues, restoring it to factory defaults or clearing specific settings. A soft reset, often performed through the thermostat’s interface, restarts the device without erasing data. This can fix minor glitches and connectivity problems. To perform a soft reset, navigate to the settings menu and select “Restart” or “Reboot”.
For more significant issues, a factory reset might be necessary. Be aware that this will erase all personalized settings, schedules, and Wi-Fi connections. To factory reset, typically you’ll need to hold down specific buttons on the thermostat for a set duration – consult the full manual for the exact procedure.

After a factory reset, you’ll need to re-connect the thermostat to your Wi-Fi network and reconfigure all your preferences within the Honeywell Home app. Ensure you have your Wi-Fi password readily available before initiating a factory reset.

Manual Control Options & Override Features
The Honeywell T5 offers robust manual control, allowing direct temperature adjustments independent of programmed schedules. Utilize the touchscreen or the Honeywell Home app to instantly raise or lower the setpoint. Override features provide temporary deviations from your schedule, perfect for unexpected changes in occupancy or comfort needs.
Temporary overrides let you set a new temperature for a defined period, after which the thermostat automatically reverts to the programmed schedule. Permanent holds, conversely, maintain the adjusted temperature indefinitely until manually changed. The “Home/Away” function provides a quick way to switch between energy-saving and comfort modes.
Easy manual control of the temperature set-point, heating/cooling schedule, home/away, and vacation features are available. These features ensure you always have command over your home’s climate, even when automated scheduling is in place. Experiment with these options to find the perfect balance between convenience and energy efficiency.

Comparing the T5 to Other Honeywell Models
The Honeywell T5 positions itself as a mid-range smart thermostat within Honeywell’s broader product line. Compared to the Lyric T6, the T5 generally offers fewer advanced features, such as more granular scheduling options and potentially less sophisticated geofencing capabilities. However, it retains core smart functionality like Wi-Fi connectivity and app control.
The Honeywell Pro Series, while also smart, focuses more on professional installation and advanced system compatibility, often including features for coolant recirculation and radiator cooling. The iconic T-86, a classic circular model, represents a historical predecessor, lacking the smart features of the T5.
The T5’s strength lies in its balance of affordability and functionality, making it an excellent entry point into smart home climate control. It’s a reasonably priced option, especially when compared to premium models like Nest, while still offering compatibility with Apple HomeKit and voice control via Siri and Amazon Alexa.
Safety Information and Warranty Details
Prior to installation and operation of your Honeywell T5 Smart Thermostat, carefully review all safety precautions. Disconnect power to your heating and cooling system at the breaker box before commencing any wiring. Improper wiring can lead to system malfunction, electrical hazards, or damage to the thermostat.
This device is intended for indoor use only and should not be exposed to direct sunlight, extreme temperatures, or moisture. Do not attempt to disassemble or repair the thermostat yourself; contact qualified service personnel for assistance. Regularly inspect wiring connections for tightness and corrosion.
Honeywell provides a limited warranty against defects in materials and workmanship. The standard warranty period is typically one year from the date of purchase. Warranty coverage may vary depending on the region and specific product registration. Refer to the included warranty documentation for complete details, including claim procedures and exclusions. Proof of purchase is required for all warranty claims.