
Chain Link Fence Installation Guide
Detailed PDF resources from Building Materials specify PVC-coated chain link systems‚ covering framework‚ fabric‚ posts‚ and accessories for robust installations.
Comprehensive guides‚ like those from Fencing Without Boundaries‚ detail securing tension wire and proper bolt usage for lasting fence stability and security.
Installation instructions emphasize the importance of loop caps for quick top rail placement‚ ensuring a smooth and efficient fencing project completion.
Chain link fencing represents a practical and economical solution for securing properties‚ offering a balance of affordability and durability. PDF installation guides‚ readily available from manufacturers like Building Materials‚ provide detailed specifications for constructing these systems‚ encompassing everything from material selection to precise installation techniques.
These guides typically outline the components – fabric‚ posts‚ rails‚ and fittings – and their respective roles in creating a secure perimeter. Understanding these components is crucial for a successful installation‚ and the PDF resources offer visual aids and step-by-step instructions to guide homeowners and professionals alike.
Furthermore‚ resources from Fencing Without Boundaries highlight critical details‚ such as ensuring the correct side of the fabric faces outward‚ and proper tensioning methods. These PDFs aren’t just about assembly; they emphasize best practices for longevity and security‚ making chain link a reliable choice for years to come.
Benefits of Chain Link Fences
Chain link fences offer a compelling combination of security and cost-effectiveness‚ making them a popular choice for residential and commercial properties. PDF installation guides emphasize this affordability‚ detailing how to maximize value through efficient material use and straightforward installation processes.

Beyond cost‚ chain link provides excellent perimeter security‚ deterring unauthorized access while maintaining visibility – a key benefit highlighted in various resources. These guides also showcase the durability of properly installed chain link‚ particularly when utilizing PVC-coated options specified in Building Materials’ documentation.
Moreover‚ the relatively simple installation process‚ as outlined in guides from Fencing Without Boundaries‚ reduces labor costs. The PDF resources empower DIY enthusiasts‚ while also providing professionals with a standardized approach to ensure consistent quality and long-lasting performance‚ solidifying chain link’s position as a practical fencing solution.
Cost Considerations for Chain Link Fencing
Chain link fencing is generally recognized as one of the most affordable perimeter security options‚ a point consistently reinforced within PDF installation guides. However‚ total costs vary based on several factors detailed in these resources.
Material choices significantly impact price; PVC-coated chain link‚ as specified by Building Materials‚ typically costs more than standard galvanized steel. Guides also highlight the expense of posts – steel versus aluminum – and the length/gauge of the chain link fabric itself.
Installation costs can be minimized through DIY installation‚ with PDF guides from sources like Slagle Fence and Fencing Without Boundaries providing step-by-step instructions. However‚ permits and potential professional assistance for post setting should be factored into the budget. Ultimately‚ careful planning using available PDF resources is crucial for cost-effective chain link installation.
Planning Your Chain Link Fence Installation
PDF guides emphasize verifying property lines and checking local regulations before starting; permits are often required for fence installations‚ as detailed in resources.
Careful layout and design‚ informed by PDF specifications‚ ensure efficient material use and a secure‚ aesthetically pleasing fence system for your property.
Local Regulations and Permits
Before commencing any chain link fence project‚ consulting local regulations is paramount‚ as highlighted in numerous installation PDF guides. Many municipalities enforce specific height restrictions‚ setback requirements from property lines‚ and aesthetic guidelines concerning fence materials and designs.
Failing to obtain necessary permits can result in costly fines‚ delays‚ or even the requirement to dismantle the newly installed fence. PDF documents often advise homeowners to contact their local zoning or building department to ascertain the specific regulations applicable to their location.
These regulations frequently address factors like fence height (often capped at six or eight feet)‚ allowable materials‚ and potential visibility obstructions. Some areas may also have restrictions on fence placement near easements or utility lines. Thorough research‚ aided by PDF resources‚ is crucial for a compliant and trouble-free installation.
Understanding these rules upfront saves time and money‚ ensuring your chain link fence project adheres to all local ordinances.
Property Line Verification
Accurate property line identification is a critical first step‚ frequently emphasized within comprehensive chain link fence installation PDF guides. Building a fence on a neighbor’s property can lead to legal disputes and costly relocation efforts. PDF resources strongly recommend referencing official property surveys and plats.
These documents‚ typically obtained from the county recorder’s office‚ precisely delineate property boundaries. If a recent survey is unavailable‚ consider hiring a professional surveyor to establish clear property lines before installation. PDF guides often caution against relying solely on visual estimations or assumptions.
Furthermore‚ it’s prudent to communicate with neighbors regarding the planned fence location to avoid potential misunderstandings. A shared understanding and agreement can prevent future conflicts. PDF checklists often include a step for neighbor notification. Confirming boundaries using official records‚ as detailed in PDF instructions‚ is essential for a legally sound fence installation.
Fence Layout and Design
Chain link fence installation PDF guides highlight the importance of careful planning before commencing work. A well-thought-out layout maximizes functionality and aesthetic appeal. Consider the terrain; slopes may require stepped or racked fence sections‚ as detailed in some PDF instructions.

Gate placement is another crucial design element. PDF resources suggest positioning gates for convenient access while minimizing disruption to the fence line. Determine the desired fence height and length‚ factoring in post spacing – typically 8-10 feet‚ as specified in many PDF documents.
Visualizing the fence with stakes and string helps confirm the layout before permanent installation. PDF guides often include diagrams illustrating various design options. Consider local regulations regarding fence height and setbacks. A detailed plan‚ informed by PDF recommendations‚ ensures a successful and compliant fence installation.
Materials and Tools Required
PDF guides detail specifications for chain link fabric‚ post materials (steel or aluminum)‚ top rail‚ and gate components for a complete system.
Essential tools‚ as outlined in PDFs‚ include post hole diggers‚ concrete mixers‚ pipe cutters‚ and tensioning tools for efficient installation.

PVC-coated materials‚ per PDF specifications‚ offer durability and corrosion resistance‚ ensuring a long-lasting and secure fence structure.
Chain Link Fabric Specifications
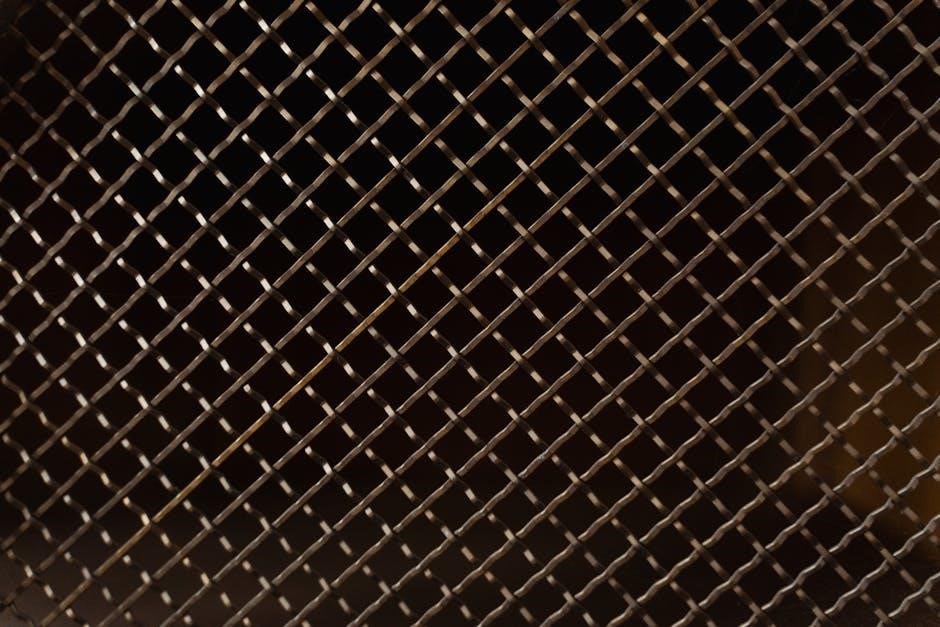
PDF documents from building material suppliers meticulously outline chain link fabric specifications‚ crucial for a successful installation. These PDFs detail gauge (wire thickness) – commonly 9 or 11 gauge‚ with lower numbers indicating heavier‚ more durable wire. Mesh size‚ typically 2″‚ 2 1/4″‚ or 2 3/8″‚ dictates the opening size and is selected based on security and aesthetic preferences.
PVC coating‚ as specified in PDFs‚ is a vital consideration‚ offering corrosion resistance and extending the fence’s lifespan. Coating types and colors are detailed‚ ensuring aesthetic compatibility with the surrounding environment. Fabric height‚ ranging from 3ft to 12ft‚ is determined by the intended purpose and local regulations. PDFs also clarify the importance of zinc coating before PVC application for enhanced rust prevention‚ guaranteeing long-term performance and structural integrity.
Understanding these specifications‚ as presented in comprehensive PDF guides‚ is paramount for selecting the appropriate fabric for your specific needs.
Post Materials (Steel‚ Aluminum)
PDF installation guides detail post material options: steel and aluminum‚ each with distinct advantages. Steel posts‚ often galvanized for rust resistance‚ provide superior strength and are ideal for high-security applications or areas with significant wind loads. PDFs specify various steel post schedules (e.g.‚ Schedule 40) indicating wall thickness and load-bearing capacity.
Aluminum posts‚ detailed in PDF specifications‚ are lightweight‚ corrosion-proof‚ and suitable for residential applications‚ particularly near saltwater environments. PDFs outline aluminum alloy compositions and temper designations‚ influencing strength and durability. Post diameter and wall thickness are critical factors‚ as outlined in PDF charts‚ dictating post stability.
PDF resources emphasize proper post embedment depth‚ varying based on fence height and soil conditions‚ ensuring a secure and long-lasting fence structure. Careful consideration of these PDF-provided specifications is crucial for optimal performance.
Top Rail and Fittings
PDF guides detail top rail installation as a crucial step before hanging the chain link fabric. Typically‚ top rail sections‚ commonly 21-foot lengths‚ rest upon line posts using “loop caps” – a key fitting detailed in PDF diagrams. These loop caps secure the rail and allow for expansion and contraction. PDFs specify rail diameter and gauge‚ impacting overall fence strength.
Terminal posts require specialized fittings‚ such as end cups and tension bands‚ as illustrated in PDF schematics. These fittings securely anchor the top rail and facilitate tensioning. PDF resources emphasize proper alignment of rail sections and the use of carriage bolts to connect fittings;
PDF instructions highlight the importance of using the correct fittings for the chosen rail material (steel or aluminum) to ensure compatibility and prevent corrosion. Following these PDF guidelines guarantees a structurally sound top rail assembly.
Gate Components
PDF guides detail gate framework construction‚ specifying post sizes and gauge requirements for varying gate widths. These PDFs illustrate hinge and latch placement‚ emphasizing proper alignment for smooth operation. Gate posts‚ often larger in diameter than line posts‚ require deeper concrete footings‚ as detailed in PDF diagrams.
Hinges come in various types – strap‚ post‚ and butterfly – each detailed with installation instructions in PDF resources. Latches‚ including fork and self-closing options‚ require precise mounting to ensure secure closure. PDFs specify hardware materials (galvanized steel‚ aluminum) for corrosion resistance.
PDF documentation stresses the importance of using compatible gate components – hinges and latches designed for the gate’s weight and size. Following these PDF guidelines ensures a durable and secure gate installation‚ enhancing the overall fence system’s functionality.
Essential Tools for Installation
PDF installation guides consistently list a pipe cutter as crucial for precise post and rail sizing‚ avoiding jagged edges. A post hole digger or auger is essential for creating appropriately sized and spaced post footings‚ detailed in PDF diagrams. Concrete mixing tools – a wheelbarrow‚ shovel‚ and hoe – are necessary for preparing the concrete base.
PDFs emphasize the need for tensioning tools‚ like a come-along or chain stretcher‚ to properly tighten the chain link fabric. Pliers are vital for securing tension wire‚ as illustrated in PDF step-by-step instructions. A level ensures posts are plumb‚ and a measuring tape guarantees accurate spacing.
Safety gear – gloves‚ safety glasses‚ and work boots – are consistently recommended in PDF safety sections. Having these tools readily available‚ as outlined in the PDF checklists‚ streamlines the installation process and ensures a professional result.
Step-by-Step Installation Process
PDF guides detail setting line posts in concrete‚ followed by corner and gate post installation‚ ensuring proper alignment and stability for the fence.
Instructions cover attaching top rail with loop caps‚ then hanging and tensioning the chain link fabric for a secure and taut fence structure.
Visual aids in PDFs demonstrate each step‚ simplifying the process for DIYers and ensuring a professional-looking chain link fence installation.
Setting Line Posts
PDF installation guides consistently emphasize the critical importance of properly setting line posts as the foundation of a durable chain link fence. Begin by accurately marking post locations according to your planned layout‚ typically spaced 8-10 feet apart. Excavate holes with a diameter of approximately 8-12 inches and a depth determined by local frost line requirements – generally 24-36 inches.
Detailed diagrams within these guides illustrate placing a gravel base in each hole for improved drainage. Carefully position the line posts‚ ensuring they are plumb using a level. Then‚ gradually add concrete around the post‚ consistently checking for vertical alignment. PDFs often recommend using a quick-setting concrete mix for faster project completion. Allow the concrete to fully cure – typically 24-48 hours – before proceeding to the next installation stage. Proper post setting guarantees fence stability and longevity.
Installing Corner and Gate Posts
Chain link fence installation PDFs highlight that corner and gate posts require significantly more robust installation than line posts due to increased tension. Excavate holes for these posts with a larger diameter – typically 10-12 inches – and greater depth‚ often exceeding frost line requirements by 6-12 inches.
Detailed instructions emphasize reinforcing these posts with additional concrete and‚ in some cases‚ rebar for enhanced stability. Ensure posts are perfectly plumb before the concrete sets‚ as any deviation will affect the entire fence alignment. PDF guides often illustrate bracing techniques to maintain post position during concrete curing; Gate posts specifically need to withstand gate weight and operational forces‚ demanding extra attention to secure footing and post strength. Proper installation of these key posts is vital for a secure and functional fence.
Attaching Top Rail and Loop Caps

Chain link fence installation PDFs consistently demonstrate that top rail installation precedes fabric hanging for optimal efficiency. Typically‚ 21-foot lengths of top rail are used‚ resting upon line posts via loop caps – specialized guides ensuring secure placement. Detailed guides emphasize proper alignment of the top rail‚ maintaining a consistent height across the fence line.
PDF instructions illustrate connecting the top rail at corners‚ ends‚ and gate posts using tension bands and carriage bolts. These connections must be tight to prevent rail sagging and maintain fence integrity. Loop caps are crucial for smooth fabric tensioning‚ preventing damage during installation. Resources highlight the importance of using the correct hardware and tightening bolts to specified torque levels for a durable‚ long-lasting fence structure.
Hanging the Chain Link Fabric
Chain link fence installation PDFs detail a systematic approach to fabric hanging‚ beginning with unrolling the fabric along the fence line. Instructions emphasize starting at a corner or end post‚ securing the fabric with hog rings or tie wires to the top rail. PDF guides specify consistent spacing between attachment points – typically every 12 to 18 inches – to distribute tension evenly.
Resources highlight the importance of maintaining the correct fabric orientation‚ ensuring the finished side faces outwards. Detailed diagrams illustrate proper knot tying techniques for secure attachment to the framework. Installation manuals caution against over-stretching the fabric during this phase‚ as it can lead to distortion and premature failure. Consistent‚ even attachment is key to a professional-looking and durable chain link fence.
Tensioning the Chain Link Fabric
Chain link fence installation PDFs consistently emphasize tensioning as crucial for a secure and aesthetically pleasing fence. Guides detail using a chain link stretcher – a specialized tool – to apply even tension along the fabric’s length. Instructions specify attaching the stretcher to the fabric with a tension band and securing it to a sturdy anchor point.
PDF resources illustrate incrementally tightening the stretcher‚ monitoring the fabric’s tautness. Manuals caution against over-tensioning‚ which can damage the fabric or posts. Detailed diagrams show how to properly secure the tension band once the desired tension is achieved. Installation guides also highlight the importance of tension wire‚ running along the bottom‚ to prevent sagging and maintain consistent tension over time‚ ensuring long-lasting fence integrity.
Gate Installation
PDF guides detail gate post installation‚ hinge and latch placement‚ and precise alignment procedures for smooth operation and secure closure.
Resources emphasize proper bolt securing and adjustments for optimal gate functionality‚ as outlined in comprehensive installation manuals.
Instructions cover gate hardware specifics‚ ensuring a durable and reliable access point within your chain link fence system.
Gate Post Installation
PDF installation guides consistently emphasize the critical importance of robust gate post installation for long-term fence functionality. These documents detail the necessity of using larger diameter posts compared to line posts‚ typically steel‚ to withstand the repeated stress of gate operation.
Proper depth and concrete footing size are meticulously specified‚ varying based on gate width and anticipated usage. Guides illustrate digging appropriately sized holes and accurately positioning the post‚ ensuring it remains plumb during concrete pouring.
Reinforcement with rebar within the concrete footing is often recommended‚ enhancing stability and preventing shifting. Detailed diagrams showcase correct rebar placement. Furthermore‚ the PDF resources stress the importance of allowing sufficient curing time for the concrete before attaching gate hardware‚ typically a minimum of 72 hours‚ to guarantee a secure and lasting installation.
Hinge and Latch Installation
Chain link fence installation PDFs provide detailed instructions for hinge and latch attachment‚ emphasizing the use of appropriate hardware for secure gate operation. They typically illustrate various hinge types – band hinges‚ post hinges – and their correct positioning on both the gate frame and the gate post.
Precise alignment is crucial; guides stress the importance of ensuring hinges are level and securely fastened with carriage bolts‚ preventing gate sag or binding. Latch installation instructions detail proper placement for smooth engagement and reliable closure.
Adjustable latches are often recommended‚ allowing for fine-tuning to compensate for minor shifts or settling. PDFs highlight the need to regularly inspect and tighten all hardware‚ ensuring continued security and preventing gate malfunction over time‚ contributing to the fence’s overall longevity.
Gate Adjustment and Alignment
Chain link fence installation PDFs consistently emphasize the critical step of gate adjustment after initial installation. These guides detail methods for achieving proper swing and latching‚ often involving shimming hinges to correct for slight misalignments caused by post settling or ground variations.
Precise adjustments are made by loosening hinge bolts and gently maneuvering the gate until it swings freely and latches securely without binding. PDFs illustrate techniques for checking gate height and plumbness‚ ensuring a professional finish and optimal functionality.
Troubleshooting sections address common issues like dragging gates or latching difficulties‚ providing step-by-step solutions. Regular re-checking of alignment is recommended‚ particularly after periods of heavy use or weather changes‚ maintaining the gate’s smooth operation and security.
Finishing Touches and Maintenance
PDF guides detail securing the fence bottom and tension wire installation for stability. Regular inspection is crucial‚ alongside maintenance‚ to ensure longevity and security.
Resources highlight the importance of periodic checks for corrosion and damage‚ promoting a lasting‚ well-maintained chain link fence system.
Tension Wire Installation
PDF installation guides‚ such as those from Fencing Without Boundaries‚ meticulously detail the process of tension wire installation‚ a critical step for a secure and taut chain link fence. The wire‚ typically run along the bottom rail‚ significantly enhances the fence’s structural integrity and prevents sagging over time.
Instructions emphasize wrapping the tension wire around the bottom rail end band carriage bolt‚ securing it firmly with multiple twists using pliers. This creates a robust connection‚ ensuring the wire remains in place and effectively distributes tension across the fence fabric. It’s crucial that the tension wire runs consistently on the outside of the fence‚ as specified in detailed diagrams within these guides.
Proper tensioning is paramount; the wire shouldn’t be overly tight‚ risking damage to the fence‚ nor too loose‚ compromising its security. PDFs often include recommendations for appropriate tension levels based on fence height and fabric gauge‚ providing homeowners with the knowledge to achieve optimal results. Following these guidelines ensures a professional-looking and long-lasting chain link fence installation.
Securing the Bottom of the Fence
PDF installation manuals consistently highlight the importance of securely fastening the bottom of the chain link fence to prevent lifting‚ animal intrusion‚ and maintain overall stability. This often involves utilizing tension wire‚ as detailed in guides from Fencing Without Boundaries‚ which is wrapped around the bottom rail and secured to the terminal posts.
Instructions emphasize the use of 5/16 x 1-1/4 carriage bolts to firmly attach the tension wire‚ ensuring a robust connection. The wire is twisted multiple times with pliers to maximize its holding power‚ effectively anchoring the fence fabric to the framework. Some PDFs also recommend adding a bottom rail to further reinforce this area.
Proper ground contact is crucial; ensuring the fence fabric doesn’t drag on the ground prevents wear and tear and maintains a clean appearance. Guides often suggest adjusting the tension to achieve a slight lift‚ preventing ground contact while still providing a secure barrier. Following these steps‚ as outlined in detailed PDFs‚ guarantees a durable and effective fence installation.
Regular Inspection and Maintenance
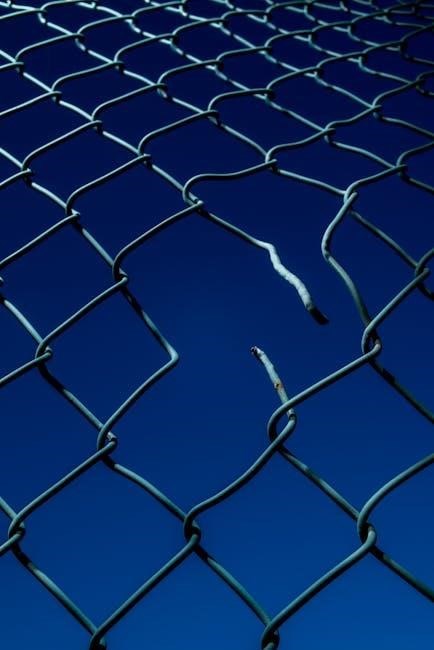
PDF installation guides emphasize proactive maintenance for longevity. Routine inspections‚ ideally twice yearly‚ should focus on identifying loose tension wire‚ damaged fabric‚ or corroded fittings. Addressing these issues promptly prevents minor problems from escalating into costly repairs‚ as highlighted in various PDF resources.
Guides recommend checking post stability‚ ensuring they remain plumb and firmly set in concrete. Tighten any loose bolts or connections‚ and replace damaged components immediately. Applying a protective coating to steel posts can prevent rust‚ extending their lifespan‚ a detail often found in PDF specifications.
Regularly clear vegetation growing around the fence line to prevent it from compromising the structure or providing a climbing aid. PDFs also suggest inspecting gate hinges and latches for smooth operation and secure closure. Consistent upkeep‚ guided by PDF recommendations‚ ensures a secure and aesthetically pleasing fence for years to come.