Arachnid Dart Board Instruction Manual: A Comprehensive Guide
Arachnid, the originator of electronic darts, provides rugged and reliable dartboards; this manual details setup, gameplay, and troubleshooting for optimal enjoyment;
This guide covers everything from initial setup and safety to advanced features like Galaxy 3 Service Mode and dart calibration.
Arachnid has proudly pioneered the world of electronic dartboards, establishing itself as the original innovator in this exciting arena. For decades, Arachnid has been dedicated to crafting durable and dependable dartboards, designed to withstand countless hours of competitive play and casual fun.
These boards aren’t just about longevity; they’re about enhancing your gaming experience. Arachnid boards offer precise dart recognition and a variety of engaging game options. Whether you’re a seasoned professional or a beginner, an Arachnid board provides a thrilling and accessible experience for all skill levels.
This manual will guide you through maximizing your Arachnid board’s potential, ensuring years of enjoyment.
Understanding Safety Precautions
Safety is paramount when enjoying your Arachnid dartboard. While Arachnid boards utilize safety darts designed to minimize injury, it’s crucial to remember that darts are projectiles and can cause harm if misused.
Always ensure a clear and spacious area around the board – approximately 10 feet of open space is recommended – free from obstructions and bystanders. Never lean against the board or attempt to retrieve darts while a game is in progress.
Inspect darts regularly for damage, replacing any with bent or broken points. Never throw darts at anything other than the board. Keep batteries out of reach of children and dispose of them responsibly. Adhering to these precautions will ensure a safe and enjoyable experience for everyone.
Unboxing and Component Checklist
Carefully unpack your new Arachnid electronic dartboard. The box should contain the following components: the dartboard itself, a power adapter, a set of darts (typically six), and this instruction manual. Some models, like the BullShooter ILM100, may include additional mounting hardware.
Inspect all components for any signs of damage during shipping. If anything is missing or damaged, contact Arachnid customer support immediately. Retain the original packaging for potential returns or warranty claims.
Familiarize yourself with each part before proceeding with the setup. Ensure the power adapter is compatible with your local voltage. A thorough check now will prevent frustration later during installation and gameplay.
Setting Up Your Arachnid Dart Board
Proper setup is crucial for enjoying your Arachnid dartboard; this involves secure mounting, powering the board, and, if desired, cabinet installation.
Mounting the Dart Board: Location and Height
Proper mounting ensures both safety and optimal gameplay. Select a location allowing at least ten feet of clear space in front of the dartboard, preventing accidental collisions and providing ample throwing room. Avoid areas with low ceilings or obstructions.
The bullseye should be positioned 5 feet 8 inches (1.73 meters) from the floor. This standard height accommodates most players. Securely attach the board to a stud using appropriate hardware; drywall anchors alone are insufficient. Ensure the board is level for accurate scoring.
Consider a protective surround or cabinet to minimize damage to walls and protect stray darts. Regularly inspect the mounting hardware to confirm stability and prevent accidents. A well-mounted board enhances the overall dart-playing experience.
Powering Up the Board and Initial Setup
Connect the power adapter to the dartboard and a suitable power outlet. Upon initial power-up, the display should illuminate, initiating a self-test sequence. If the display remains blank, verify the power connection and adapter functionality.
Access the setup mode, often by pressing and holding the ‘Test’ button located on the main PC board. This allows for initial configuration of game settings, such as player handicaps and scoring options. Familiarize yourself with the control panel buttons and display indicators.
Calibrate the board if prompted, ensuring accurate dart recognition. Some models may require coin insertion before gameplay begins. Refer to the control panel for specific instructions.
Cabinet Installation (If Applicable)
If you’ve purchased a cabinet for your Arachnid dartboard, select a location providing approximately ten feet of open space in front of the board for safe throwing. Ensure the wall is suitable for mounting the cabinet’s weight, utilizing appropriate wall anchors if necessary.
Carefully position the cabinet, ensuring it’s level before securing it to the wall. Follow the cabinet’s specific installation instructions, typically involving mounting brackets and screws. Once secured, carefully install the dartboard into the cabinet, aligning it properly.
Say goodbye to partner complaints about stray darts! A cabinet provides protection and enhances the overall aesthetic. Double-check all connections and stability before commencing gameplay.
Navigating the Control Panel
The control panel features buttons for game selection, setup access, and display indicators; understanding these functions unlocks advanced options and customized gameplay experiences.
Button Functions and Display Indicators
The Arachnid dartboard’s control panel boasts several key buttons. The ‘Test’ button initiates self-diagnosis and accesses setup mode. Other buttons control game selection, player input, and sound volume. Display indicators illuminate to show active games, player turns, and scoring information.

Understanding these indicators is crucial. A flashing light might signal a low coin count or an error. The display shows current scores, remaining darts, and game settings. Familiarize yourself with the panel’s layout; it’s your gateway to customizing the gaming experience. Proper use ensures smooth gameplay and accurate scoring. Refer to the manual for specific button combinations and indicator meanings.
Entering Setup Mode: Accessing Advanced Options
Accessing the setup mode on your Arachnid dartboard unlocks a range of advanced options for customization. Typically, this is achieved by pressing and holding the ‘Test’ button located on the main PC board. This initiates a diagnostic sequence and grants access to settings like game parameters, credit configurations, and service functions.
Within setup, you can adjust scoring rules, modify game variations, and calibrate dart recognition. The Galaxy 3 Service Mode, a powerful tool, is also accessed here. Exercise caution when altering settings, as incorrect configurations can affect gameplay. Always consult the manual before making changes to ensure optimal performance.
Adjusting Game Settings
Within setup mode, you can tailor your Arachnid dartboard experience by adjusting game settings. This includes modifying scoring parameters for various game types – 301, 501, Cricket, and more. You can customize the winning score, double-in/double-out requirements, and even adjust the penalty for hitting the bullseye in Cricket.
Furthermore, settings allow for credit adjustments, influencing game access and duration. Top Gun editing, also accessible here, lets you modify player handicaps and skill levels. Remember to save any changes made to ensure they are retained. Careful adjustment of these settings ensures a balanced and enjoyable gaming experience for all players.

Game Play and Scoring
Arachnid boards accurately recognize darts and calculate scores based on established scoring zones; error handling ensures fair play during various game variations.
Understanding Scoring Zones and Rules
Arachnid dartboards utilize a standard scoring layout, with numbered segments from 1 to 20. The bullseye is worth 50 points, surrounded by the outer bull (25 points). Doubles and triples rings significantly increase scoring potential, crucial for faster game completion.
Standard game rules typically involve players taking turns throwing three darts, aiming to reduce their score to exactly zero. Hitting a double or the bullseye is required for checkout. Failing to reach zero results in a ‘bust’, reverting the score to its previous value.
Understanding these zones and rules is fundamental to enjoying competitive play and maximizing your score on an Arachnid electronic dartboard. Familiarize yourself with the layout for strategic dart placement.
Dart Recognition and Error Handling
Arachnid dartboards employ sophisticated sensors to accurately register dart impacts. However, occasional errors can occur. The board may not register a dart if it bounces out, lands on a segment line, or is thrown with insufficient force.
If a dart isn’t recognized, the board may display an error message or simply not register the score. Ensure darts are appropriately weighted and tipped for optimal recognition. Avoid throwing darts at an extreme angle.
The system is designed to minimize false readings, but occasionally a missed throw might be incorrectly registered. Understanding these potential issues helps troubleshoot gameplay and maintain a fair experience.
Playing Different Game Variations
Arachnid dartboards support a wide array of game variations beyond the standard 501 and 301. Explore options like Cricket, a popular strategic game requiring closing specific numbers, and Round the Clock, testing accuracy across the entire board.
The control panel allows easy selection of these games, with pre-programmed rulesets. Many boards also feature customizable game settings, allowing players to adjust scoring parameters and handicaps. Top Gun mode offers a unique competitive experience.
Experiment with different game types to enhance your skills and enjoy varied gameplay. Refer to the board’s display or the full manual for detailed rules of each variation.

Troubleshooting Common Issues
Arachnid boards may experience dart recognition problems, display malfunctions, or sound issues; resetting the board or checking connections often resolves these common problems.
Dart Board Not Recognizing Darts
If your Arachnid dart board consistently fails to register dart impacts, several factors could be at play. First, ensure you are using appropriate darts – typically soft-tip darts designed for electronic boards. Verify the darts are properly inserted and not damaged.
Next, check the board’s sensitivity settings within the setup mode; adjustments may be needed; A common issue involves the board needing a reset – disconnect the power supply for several minutes, then reconnect. If the problem persists, access the Galaxy 3 Service Mode (refer to the advanced features section) to calibrate target and missed dart recognition.
Finally, inspect the dartboard surface for obstructions or damage that might interfere with dart detection.
Display Malfunctions and Resetting the Board
Experiencing a blank or malfunctioning display on your Arachnid dart board can disrupt gameplay. Initially, confirm the power connection is secure. If the display remains unresponsive, a simple reset is often effective. Disconnect the power adapter from the board and leave it unplugged for at least five minutes.
Reconnect the power and observe if the display initializes correctly. For persistent issues, access the board’s setup mode via the test button on the main PC board (if accessible) and look for display calibration options. If problems continue, consult the advanced features section regarding Galaxy 3 Service Mode for more in-depth diagnostics.
Avoid attempting repairs yourself; contact customer support if the display remains faulty after these steps.
Sound Issues and Volume Control
If your Arachnid dart board isn’t emitting sound, first verify the volume isn’t muted or set too low. The control panel typically features volume adjustment buttons – experiment with increasing the level gradually. Ensure the board is configured to produce sound within the game setup options; some game variations may have audio disabled by default.
If sound is distorted or absent despite adequate volume settings, check the speaker connections internally (if you are comfortable doing so – otherwise, seek professional assistance). The game will emit a sound whenever a dart is thrown, confirming functionality.
Refer to the main control panel section for specific button functions related to audio control.

Maintenance and Care
Regular dart tip maintenance, board surface cleaning, and proper storage are crucial for extending the life and performance of your Arachnid dartboard.
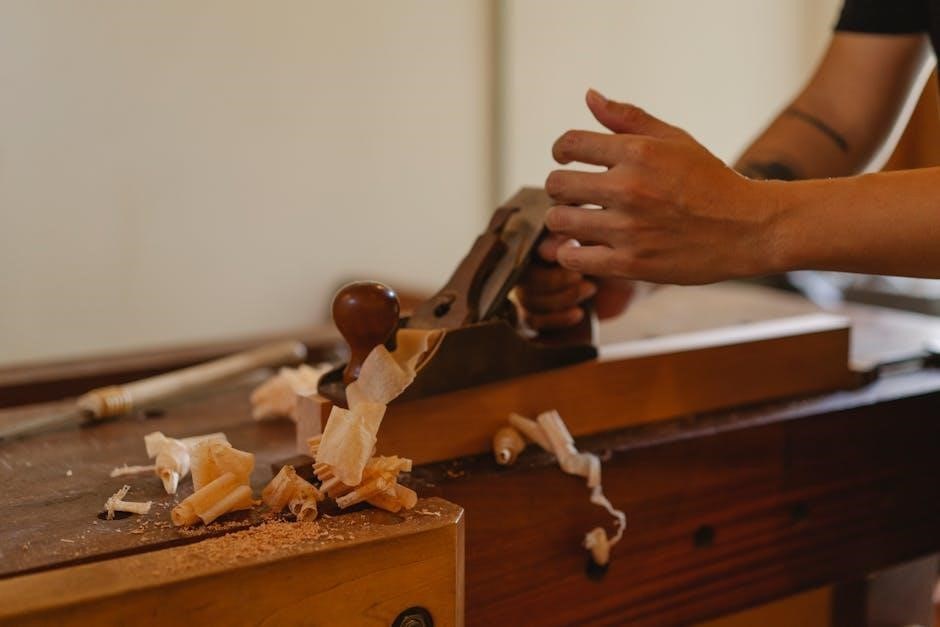
Dart Tip Maintenance and Replacement
Dart tips wear down with use, impacting scoring accuracy on your Arachnid board. Regularly inspect your dart tips for wear – flattened, missing, or damaged tips require immediate attention. Rotating darts during play distributes wear evenly across all tips, prolonging their lifespan.
Replacing dart tips is a simple process. Use a dart tip tool to carefully remove the old tip and insert a new one, ensuring a snug fit. Avoid forcing the tip, as this can damage the dart barrel. Different dart types require specific tip styles; consult your dart manufacturer’s recommendations. Maintaining sharp tips ensures optimal board penetration and accurate scoring, enhancing your gameplay experience.
Cleaning the Dart Board Surface
Regular cleaning of your Arachnid dart board surface is crucial for maintaining optimal performance and extending its lifespan. Dust and dart residue can accumulate, affecting dart recognition and scoring accuracy. Use a soft, dry cloth to gently wipe the board’s segments, avoiding abrasive cleaners or materials.
For stubborn marks, a slightly damp cloth with mild soap may be used, but ensure the board is thoroughly dried afterward. Avoid getting moisture into the board’s electronics. Do not use solvents or harsh chemicals, as these can damage the surface. Consistent cleaning ensures reliable dart recognition and a pristine playing experience, keeping your dart board in top condition for years.
Long-Term Storage Instructions
If you plan to store your Arachnid dart board for an extended period, proper preparation is essential to prevent damage. First, disconnect the power supply and remove any batteries. Carefully clean the dart board surface as outlined in the maintenance section, removing all dust and debris.
Store the board in its original packaging, if available, or a similarly protective container. Choose a dry, climate-controlled environment, avoiding areas with extreme temperatures or humidity. Avoid stacking heavy items on top of the board. Periodically check the storage location to ensure conditions remain suitable, preserving your investment for future enjoyment.
Advanced Features & Service Mode
Arachnid boards offer Galaxy 3 Service Mode for calibration and editing, including Target/Missed dart adjustments and Top Gun setup, accessible via the test button.
Galaxy 3 Service Mode Explained
Galaxy 3 Service Mode is a powerful diagnostic and calibration tool for Arachnid dartboards. Accessing this mode, typically through a hidden test button on the main PC board, allows for in-depth adjustments not available during normal gameplay.
Within Service Mode, technicians and experienced users can fine-tune dart recognition sensitivity, ensuring accurate scoring. This includes calibrating the board to correctly identify valid throws and minimize false positives or missed darts. It also facilitates adjustments to the board’s internal timing and scoring algorithms.
Furthermore, Service Mode provides access to advanced settings related to coin mechanisms (if equipped) and display functionality. It’s crucial to exercise caution when modifying settings within this mode, as incorrect adjustments can negatively impact board performance. Detailed documentation is recommended before making any changes.
Target/Missed Dart Calibration
Target/Missed Dart Calibration is a critical function within the Arachnid dartboard’s Service Mode, ensuring accurate dart detection. This process refines the board’s ability to distinguish between legitimate hits and errant throws. Calibration involves systematically throwing darts at specific segments of the board while the system learns the corresponding sensor readings.
The board analyzes the impact data, adjusting its sensitivity thresholds to minimize false positives (registering a hit when none occurred) and false negatives (missing a valid hit). Proper calibration is essential for competitive play and accurate scoring. It’s particularly important after board relocation or if inconsistent scoring is observed.
Follow the on-screen prompts carefully during calibration, and ensure consistent dart throwing technique for optimal results. Incorrect calibration can lead to frustrating inaccuracies.
Top Gun Editing and Setup
Top Gun Editing, accessible within the Arachnid dartboard’s Setup mode, allows customization of player profiles and game parameters for the popular “Top Gun” game variant. This feature enables adjusting player handicaps, setting score limits, and defining specific game rules to tailor the experience.
Through Top Gun Setup, you can input player names, skill levels, and starting scores, creating a balanced and competitive environment. The system tracks individual statistics, fostering friendly rivalry and encouraging improvement. Adjusting parameters like “double in” requirements or “checkout” rules adds strategic depth.
Carefully review the available options to configure the game according to your preferences. Proper setup ensures fair play and maximizes enjoyment for all participants.